

Capturing a sunrise is easy. Making it feel like a sunrise in your final image? That's where the real challenge begins. Straight out of the camera, even the most dramatic morning light often looks flat, dull, or lacking depth. This is especially true in high-contrast scenes where the sky blows out while the foreground sinks into shadow.
That's where Lightroom's masking and HDR tools shine. With the right approach, you can turn a washed-out scene into an image with shape, atmosphere, and that glowing sunrise magic.
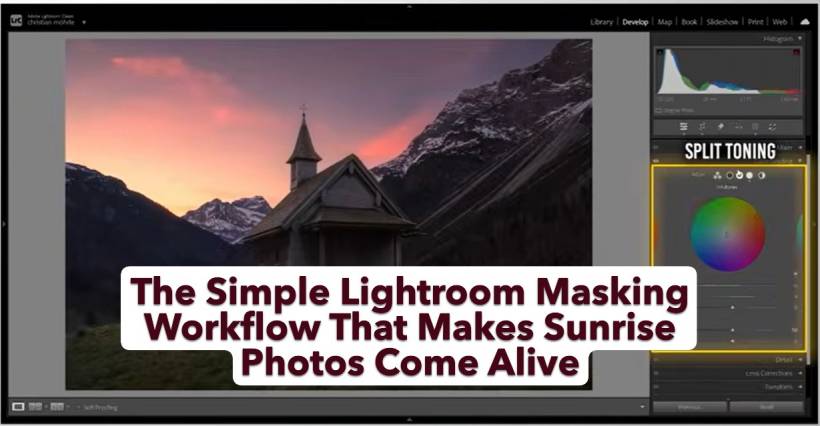
This breakdown is inspired by a great walkthrough from Christian Möhrle of The Phlog Photography, who demonstrates a clean, methodical editing flow that builds the image step-by-step rather than relying on heavy global adjustments.
Start With Data: HDR Merge for Maximum Dynamic Range
Before any color grading or masking, the first step is merging your bracketed images.
By combining five exposures — with Auto Align turned on — you preserve highlight detail in the sky while keeping the darker areas fully recoverable. This prevents you from having to pull shadows or highlights to extremes later, which often causes noise or weird color shifts.
The initial Basic panel adjustments stay soft and controlled:
The goal here is neutral balance, not a finished look. Add a warm white balance shift to introduce morning color, then sprinkle in a bit of vibrance and texture. Reduce clarity and dehaze slightly to create the hazy, dreamy atmosphere typical of sunrise scenes.
Why Masking Makes All the Difference
This is where the image begins to breathe.
Local adjustments shape light more naturally than any global slider ever could. Möhrle's workflow shows how layering masks creates separation, depth, and flow:
1. Landscape Mask for Precise Architecture Control
Using Lightroom's AI-powered Landscape mask, you can pull out small subjects like a chapel or structure without touching the surrounding landscape. Increase exposure and texture just on the building to make it pop subtly against the hills.
2. Object Select for Isolated Highlights
Dragging a quick rectangle over the hill's crest isolates the ridge. A bit of brightness and clarity emphasizes the rim light where the sun hits — a tiny change that adds huge dimensionality.
3. Foreground Gradient to Ground the Scene
A linear gradient from the bottom darkens the near foreground. This subtly anchors the viewer's eye and pushes attention upward toward the sky.
4. Multiple Sky Masks for Fine-Tuned Control
Instead of one blanket sky adjustment, Möhrle splits the sky into zones:
This layered approach prevents the sky from looking uniformly processed or fake.
Color Grading: Designing the Sunrise Palette
With the scene shaped, it's time to build the sunrise mood through split toning.
Highlights
Push a warm hue with strong saturation. This reinforces the yellow-orange luminosity of early morning light.
Midtones
Cooler tones help the upper sky stay blue and provide color contrast. Without this, the entire image risks turning into an orange blanket.
Shadows
Introduce a very subtle blue. This strengthens the warm–cool interplay without overwhelming detail.
Blend and Balance sliders fine-tune transitions, making sure the edits feel natural and not blocky. A small nudge on the Global wheel toward warmth ties everything together.
Calibration: The Secret Ingredient for Cleaner Color
Lightroom's Calibration panel often gets ignored, but in sunrise edits it can quietly enhance color harmony.
A slight drop in the Blue Primary hue and a bump in Blue Primary saturation can:
It's not mandatory, but it adds polish to the palette.
Final Touches: Targeted Sharpening
Instead of sharpening the entire image, keep detail where it matters:
This avoids bringing noise into the soft sunrise gradients.
Why This Workflow Works So Well
The magic lies in intentional separation:
Skipping masks and relying solely on global adjustments can create bold color but flattens depth. The layered masking approach brings back atmosphere, distance, and the sense of early morning air.
If you want to see the full demonstration, Möhrle's video goes through each step in a clean, practical way.


Comments